
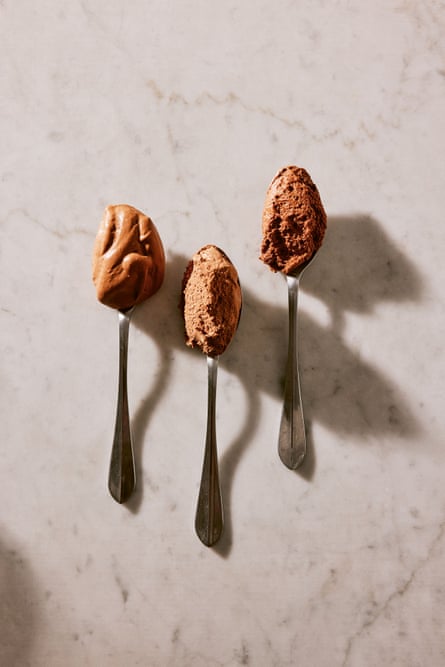
Mousse au chocolat is one of the most exquisite ways to enjoy chocolate – so here are three recipes that offer it in different textures and levels of chocolate intensity. Each one works beautifully with dark chocolate containing 65-80% cocoa solids. Blends with no specific origin can be further rounded out with one teaspoon of vanilla paste or the seeds from a vanilla bean.
Once the mousses have been prepared, they can be frozen and gently defrosted in the refrigerator. Top with chocolate shavings, cocoa nibs or a dusting of unsweetened cocoa powder for texture and contrast.
Rich and dense chocolate mousse – recipe
Serves 4–6
A rich and pure-tasting mousse that whips directly from a blended chocolate ganache, this mousse has a luxurious, truffle-like texture.
The mousse takes at least four hours to chill. You will also need to pre-chill the bowl of a stand mixer.
200g soy milk
250g dark chocolate (min. 65% cocoa solids)
250g soy milk, chilled
Heat the 200g of soy milk (unchilled) in a small saucepan over a medium heat until just steaming.
Chop the chocolate and place it into a heatproof jug. Pour the hot milk over the chocolate and let it sit for one minute.
Blend with a handheld blender, scraping down the sides of the jug if needed, until completely smooth.
Add the 250g of chilled soy milk and blend again until glossy and emulsified.
Pour into a container, place a layer of clingfilm on the surface, and chill in the fridge for at least four hours.
Once chilled, transfer the ganache to the chilled bowl of a stand mixer fitted with the whisk attachment and whip for two to four minutes until light and aerated.
Spoon or pipe the mousse into bowls or glasses and chill in the refrigerator for 20 minutes, or up to one day, before serving.
Fluffy chocolate mousse – recipe
Serves 4–6
Light and airy, with a bubbly texture from the whipped aquafaba, this is the lightest mousse in texture, with a clean, melt-in-the-mouth finish. This mousse takes at least one hour to chill in the refrigerator.
140g soy milk
210g dark chocolate (min. 65% cocoa solids)
100g aquafaba (see recipe below)
100g caster sugar
0.7g cream of tartar
Heat the milk in a saucepan until steaming.
Chop the chocolate and place it in a heatproof bowl. Pour the hot milk over the chocolate and let it sit for one minute, then whisk until smooth. Cover with a layer of clingfilm, then leave to cool slightly. It is best to fold the meringue into the ganache when it is lukewarm or at room temperature, but not cold.
Place the aquafaba, sugar and cream of tartar in a stand mixer fitted with the whisk attachment. Whisk on high speed until the meringue forms stiff, glossy peaks – this may take six to eight minutes.
Ensure the chocolate ganache base is no longer warm, then fold in one-third of the meringue. Fold in the remaining meringue in two additions, keeping as much air in the mixture as possible.
Spoon or pipe the mousse into bowls or glasses and chill in the refrigerator for at least one hour, or up to one day, before serving.
Creamy chocolate mousse – recipe
This version is made with a custard base and whipped cream, resulting in a creamy, velvety texture with a clean finish. It’s soft, rich and elegant – the most mousse-like in a classical sense.
You will need a pre-chill a bowl of a stand mixer before starting this recipe. The mousse takes at least one hour to chill in the refrigerator.
200g soy milk
35g caster sugar
5g tapioca starch
150g dark chocolate (min. 65% cocoa solids)
150g whipping cream (recipe below)
Combine the milk, sugar and tapioca starch in a saucepan and whisk until smooth. Place over a medium heat and stir constantly for a couple of minutes until the mixture just begins to bubble and thickens enough to coat a spatula.
Chop the chocolate and place it in a heatproof bowl. Pour the custard mixture over the chocolate and let it sit for one minute, then whisk until glossy. Place a layer of clingfilm on the surface and leave to cool to room temperature.
In the chilled bowl of a stand mixer, whip the whipping cream for three to four minutes until medium peaks form.
Fold one-third of the cream into the cooled chocolate custard to loosen it, then fold in the rest in two additions until fully incorporated and there are no streaks.
Spoon or pipe into bowls or glasses and chill in the refrigerator for at least one hour, or up to one day, before serving.
________________________________________________________________________________
Aquafaba from tinned chickpeas
Makes about 100-130g
Liquid from 400g tin of chickpeas, about 200g
Pour the liquid into a saucepan. Bring to a simmer over a low heat and reduce by about a third. (I check this by pouring the initial liquid into a bowl set on scales to note the starting weight, then check it while reducing by pouring it into the bowl again – 200g should reduce to 100-130g.)
Remove from the heat and leave to cool fully before using. Store in a sealed container in the refrigerator for up to five days, or in a ziplock bag in the freezer, and use as needed.
Fresh plant-based whipping cream
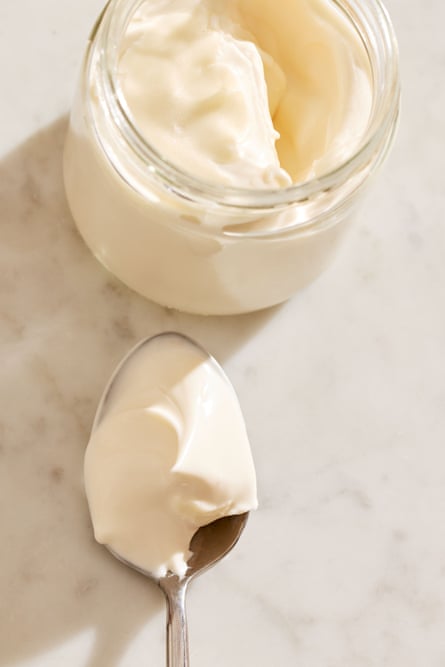
Please use deodorised coconut oil – the resulting cream will have a beautiful neutral flavour. Using virgin coconut oil will leave a strong taste and make it prone to spoiling and having an off taste.
For this recipe you will need a cooking thermometer and a pre-chilled bowl of a stand mixer, and the cream needs at least four hours to chill in the refrigerator.
Makes 500g
200g deodorised coconut oil
40g caster sugar
275g soy milk
Add the coconut oil to a microwave-safe bowl and microwave for 30 to 60 seconds until melted. Alternatively, melt in a medium saucepan over a low heat. Set aside.
Add the sugar mixture to the soy milk in a large bowl and use a stick blender or high-powered blender to blend them together.
Add the melted coconut oil to the mixture, then, using a thermometer, test the temperature. It should be 35C (95F), so warm or cool the mixture as required. Use the immersion stick blender for 30 to 60 seconds until the mixture has emulsified.
Pour the mixture into a shallow dish and press clingfilm on to the surface. Leave in the refrigerator for at least four hours to chill and “crystallise” fully – this is where the solid fat particles cool and completely solidify. The fat particles should be dispersed throughout the cream in a homogenous, creamy mixture that won’t go grainy.
Pour the mixture into the chilled bowl of a stand mixer fitted with a whisk attachment (or whisk by hand or with electric beaters making sure to chill your bowl first), until soft peaks are formed that hold their shape. If the cream is not whipping, place the mixture in the freezer for 15 minutes before whipping again in a chilled bowl.
Use immediately or reserve the whipped cream in the refrigerator until needed. To store, transfer to a container, cover with clingfilm on the surface of the cream and use the same day. The unwhipped cream can be stored in the refrigerator in a sealed container or jar for up to four days.
-
This is an edited extract from Beyond Baking by Philip Khoury, photography by Matt Russell (Quadrille; AU$55).